Monday, May 22, 2017

Fuego Rebrand

What is Fuego?

          Fuego is a store that sells a mix of accessories, apparel, jewelry, and novelty items. The store was established in 2003 and started in the Pacific Northwest but is spreading. Fuego's main purpose is to bring the huge passion for art and style into a small store.

The Rebrand

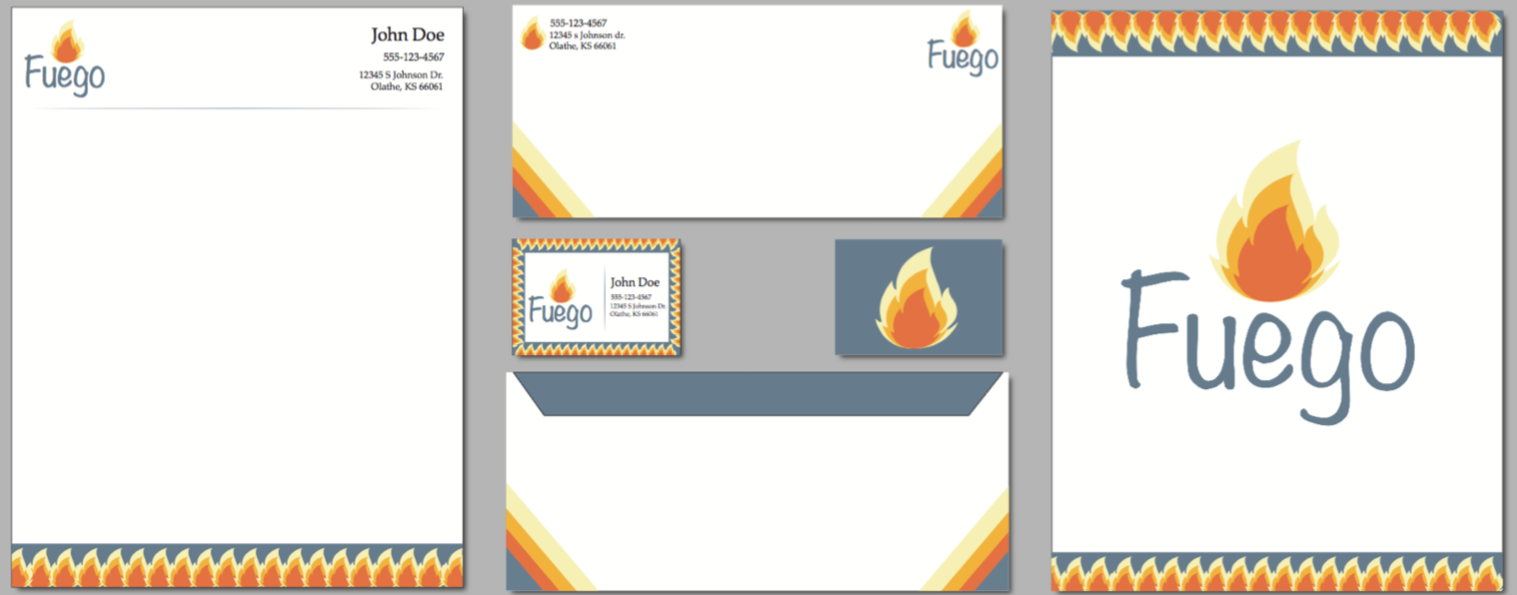
          The latest project in my graphic design class was to rebrand a company of your choice. We first had to create multiple symbols and logos. We had to pic our favorite symbols and create combination marks. A combination mark is a graphic with both a symbol and text to convey a brand image. After we picked our favorite combination mark, we then had to create a business card, a letterhead, and an envelope.  

The Combination Mark

          While creating the combination mark, I wanted to incorporate some sort of fire because fuego is Spanish for fire. We were asked to add color to our graphics, but with my graphics, most of mine looked better in just black and white. When I added the color to this specific mark, I liked the way that I created the different shades. I understand that in a real flame, the colors would be lighter towards the bottom, but I felt that the graphic looked better with the opposite of that. I used a complementary and monochromatic color scheme.

The Business Card

          For the business card, I put the combination mark to the left of the information and created a boarder around the front. Since I felt that the front was a bit busy, I made sure that the back was simple and sweet by just having the background color that grey-blue and sticking the flame in the center.


The Letterhead

          On the front of the letterhead, I put the mark in the top, left corner and the information in the top, right corner. To separate the mark and information from the actual letter itself, I put a faint line under mark and information. To balance out the top and bottom, I put the same boarder that I had on the business card, on the bottom of the letterhead. On the back of the letterhead, I put that same boarder on the top and bottom. I also to kept it simple by putting the combination mark in the center.


The Envelope

           For the envelope, I wanted to change it up just a little bit. Instead of having that same boarder, I just took the colors and created stripes and put them in the bottom corners. I put the information on the top left corner with the symbol next to it. I put the combination mark in the top right corner.

Final Display

Here is the final display of the rebrand:


Thursday, May 18, 2017

Chrome Extensions Part 3

Palette Creator

          Have you ever wanted to create a gradient or palette of the colors from an image that you found on the internet? Well with the help of this extension, you can. 

Purpose/What is it?

          This extension creates a color palette out of colors from an image of your choice. Just right click on the images and it gives you a choice between a 8, 16,  24, or a 32 color palette. It is easy to use and very useful for creating gradients. It shows the hexadecimal codes fro the colors so that you can use them in your projects. I recommend this extension for both graphic and web designers. 


Link


Wednesday, May 17, 2017

Chrome Extensions Part 2

OurStickys

          This extension allows you to create sticky notes and put them on whatever website you would like. You just have to be logged in to your Google or Facebook accounts for them to be saved on other browsers.

Purpose/What is it?

          The extension itself is very self explanatory and easy to use. It is great for any notes you want to make for any project, whether it be a common core subject or an elective. You can choose the color, font size, and when/if it expires.  It is easy to use/figure out and is kind of fun to use. You can add as much text as you want to each note as well, there are no limits.

Link

Chrome Extensions Part 1

ColorZilla

          Our latest project in Web Design was to explore Google Chrome Extensions. In this first part of my Chrome Extension posts, I will tell you about the extension, ColorZilla.

Purpose/What is it?

          This extension acts as an eye dropper tool, if you see a color that you like on a certain website or image, just click the icon and it allows you to copy the color to your clipboard. It shows the hexadecimal codes and rgb numbers of the color so that you can use that exact color in a project. It has many other features to it as well. You can look at your color history, create a CSS gradient, and it also allows you to see all of the colors used on the page of the website you are currently on. 

My Opinion

          I think that this extension is very useful and super user-friendly. If you are a designer, or just like colors, this tool is perfect and I see myself using this a lot in the future for graphic design and maybe a little bit of web (unfortunately, I will not be continuing web design, I will be in graphic design full time next year).

Link 

Friday, April 28, 2017

New Northwest Mascot?

ONW Ravens or ONW Tigers?

           In web design this week, we were asked to change our school's mascot. Our current mascot is a raven, I changed it to a tiger. I do not really have a specific reasoning behind choosing a tiger besides the fact that I thought it would be fun to vectorize one. 

Here is the current mascot and logo for the Olathe Northwest Ravens:


Here is the mascot and logo for the Olathe Northwest Tigers:


           For this project, I took an image of a tiger and vectored it using the pen tool and the brush tool. 

Friday, April 21, 2017

Past Present Future

All of the information in this blog is from my Past, Present, and Future website that I created in Web Design. The main page looks like the first image but the text was too small to see so I typed the information in the blog. This site was created with rollover images (created with the gifs seen in this blog) and just my own knowledge of myself. 


 I was born on April 8, 2001, in Overland Park, Kansas. For 8 years, I lived in a small town in Missouri, Neosho. It is very close to Joplin, Missouri for a reference. I had a boxer named Sally who shed on everything and had horrible breathe with a tongue that was too big for her mouth, but what more could you want from a dog.

My family decided to move closer to distant family during my 4th grade year, which brings me to my current home in Olathe, Kansas.

I am currently a sophomore and still have a loving family, but instead of a boxer (RIP Sally 200?-2015), I now have a cavachon puppy named Plato. I am in the e-Communications program, if you didn't know that already. I am involved in soccer and musical theatre as well.


As of right now, I have no idea what the future has in store for me. I am hoping to major in graphic design in college, maybe go to the School of Design at the University of Minnesota. But I still have 2 years and my mind might change. I guess I'll just have to wait and see.

Thursday, April 20, 2017

Index Website

Previous Index Page

         This past few weeks in web design, we have been working on updating our index website to where we used one of Dreamweaver's templates. This is my previous index page:
          This page was very basic and it just had my elevator pitch from last year and links to websites that I had created. I had the background a repeating sky theme which I though personalized it and made it differ from others in the class. Looking back on this website, I'm definitely glad that I upgraded it. My new index shows how much I have advanced in web design, even if it is not as good as the professionals, I have improved this year.

The New Index 

           This is my new index website. It was made with a Dreamweaver template and is also responsive which means that it adapts to whatever device you are viewing it on. I created my own logo for it as well. I used light/pastel colors. I also rewrote the bio because the elevator pitch was too cheesy for me. This website doesn't only include my websites, but it also includes some of my graphic design projects. 

          
          The image to the left shows how my website is responsive when the size of the device is changed.